DIY Lighting: No Electrician Needed Weekend Plans

Thinking about sprucing up your home with some new lighting but dreading the thought of calling an electrician for the weekend? Good news! You can tackle quite a few lighting projects yourself without needing professional help. This guide is all about those achievable DIY lighting upgrades that you can knock out over a weekend, making your space feel refreshed and more functional.
When we talk about DIY lighting without an electrician, plug-in solutions are your best friend. These are the projects that require minimal tools and absolutely no messing with your home’s wiring. Think of them as instant upgrades that make a big difference.
Lamps Galore: More Than Just Shade
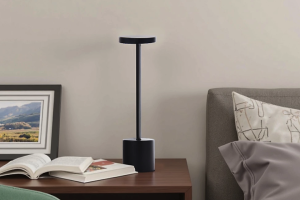
Lamps are the foundation of accessible DIY lighting Catnup. They’re versatile, come in endless styles, and often just need a good bulb to come alive.
Finding the Right Fixture
Don’t just grab the first lamp you see. Consider the room’s overall style and the kind of light you need. Do you want a reading lamp with a focused beam, or ambient light to create a mood? Look for lamps with adjustable arms or dimmer switches for added flexibility. Thrift stores and antique shops can be goldmines for unique, affordable finds that you can update with a fresh coat of paint or a new shade.
Bulb Upgrades: The Hidden Powerhouse
The bulb is just as important as the lamp itself.
- LEDs are King: They’re energy-efficient, long-lasting, and come in a huge range of color temperatures. For living spaces, a warm white (around 2700K) is usually cozy. For task lighting like a desk lamp, a cooler white (around 4000K) can be more effective.
- Smart Bulbs: Want to control your lights from your phone or set schedules? Smart bulbs are a game-changer. They screw into regular sockets, and setup is usually a breeze through an app. You can change colors, dim them, and even group them together.
String Lights: Beyond the Holidays
String lights have moved beyond festive decorations. They’re incredibly versatile for adding atmosphere and subtle illumination.
Placement is Key
- Around Mirrors: This is a classic for a reason. It adds a bit of glamour and extra light for getting ready.
- On Shelving: Drape them along bookshelves or display shelves to highlight your items and add a cozy glow.
- Around Windows: This can create a soft, inviting ambiance, especially in bedrooms or living rooms.
- Outdoor Patios and Balconies: Weather-resistant string lights can transform an outdoor space into a magical hangout spot. Just ensure they’re rated for outdoor use.
Powering Up Safely
Most decorative string lights are plug-in. Just ensure the cords aren’t frayed and that they aren’t running under rugs where they could be damaged or overheat. For outdoor use, always use outdoor-rated cords and fixtures, and consider a GFCI-protected outlet if you’re near water.
Enhancing Existing Fixtures: Small Tweaks, Big Impact
You don’t always need to replace a fixture to improve its lighting. Sometimes, a few simple modifications can make a world of difference.
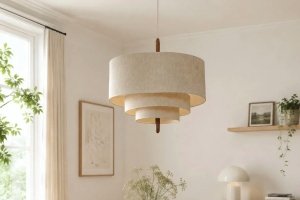
Shade Swaps: A Fresh Look
A lampshade might seem like a small detail, but it significantly impacts the light quality and the overall aesthetic of a room.
Choosing the Right Shade
- Material Matters: Opaque shades cast more directed light, while translucent shades diffuse it softly. Silk, linen, and paper offer different levels of light diffusion.
- Size and Shape: The shade should be proportionate to the lamp base. A shade that’s too small or too large can look awkward and affect how the light is distributed. Generally, the shade’s height should be about 75% of the lamp base’s height.
- Color: Light-colored shades reflect more light, making a room brighter. Darker shades absorb more light, creating a cozier, more intimate feel.
Installation is a Breeze
Replacing a lampshade is usually as simple as unscrewing the old finial (the decorative knob on top), lifting off the old shade, placing the new one, and re-screwing the finial. Make sure the new shade fits securely.
Fixture Facelifts: A Touch of Shine
Sometimes, a ceiling fixture or a wall sconce just needs a little refresh to look new again.
Cleaning and Polishing
Dust and grime can dim even the brightest fixture. For most metal fixtures, a good clean with a soft cloth and some appropriate metal polish can bring back their shine. For glass or crystal elements, glass cleaner is your best bet. Always unplug the fixture before cleaning.
Adding Embellishments
- Crystal Strands: You can often find pre-made crystal strands that attach to existing hooks or rings on a chandelier or pendant light. This adds a touch of sparkle without needing to replace the whole fixture.
- Fabric Wraps: For some basic fixtures, you can even wrap them with decorative fabric or ribbon (using heat-resistant adhesive, of course) for a customized look.
Under Cabinet Lighting: Illuminating Your Workspace
Under cabinet lighting is a game-changer for kitchens and workshops. It banishes shadows where you need light the most and adds a professional finish to your space. The great news? Many excellent options are plug-in or battery-operated.
Plug-in LED Strips: Flexible and Bright
These are often sold in kits and are incredibly easy to install.
Installation Process
- Clean the Surface: Make sure the underside of your cabinets is clean and dry.
- Measure and Cut: If the LED strip is too long, you can usually cut it at designated points (look for scissor marks).
- Apply Adhesive: Most kits come with strong adhesive backing. Peel off the backing and press the strip firmly into place.
- Connect Power: The strips will have a connector that plugs into a power adapter, which then plugs into a wall outlet. Some kits come with discreet power adapters that can be hidden.
Placement Strategies
- Along the Front Edge: This provides direct light onto your countertops.
- Slightly Recessed: If you want a more diffused glow, position the strips a little further back from the edge. This also helps hide the LEDs themselves.
Battery-Powered Options: Cordless Convenience
For areas where running a cord is difficult, battery-powered LED puck lights or light bars are a fantastic solution.
Types of Battery Lights
- Puck Lights: Small, round lights that are great for individual task lighting or to illuminate specific areas.
- Light Bars: Longer, strip-like lights that offer more linear illumination.
- Motion-Activated: These are super convenient; they turn on when they detect movement and turn off automatically after a set period.
Installation and Maintenance
These usually attach with adhesive strips or small screws. Replacing batteries is straightforward. Look for lights with long battery life to minimize maintenance.
Smart Lighting Controls: The Future of Illumination
Smart lighting isn’t just about fancy apps; it’s about convenience, energy savings, and creating custom lighting scenes. Many smart lighting solutions are plug-and-play, meaning no wiring is involved.
Smart Plugs: Turning Anything into “Smart”
These are arguably the easiest entry point into smart lighting.
How They Work
A smart plug simply replaces a standard wall outlet. You plug your existing lamp or other light source into the smart plug, and then plug the smart plug into the wall. Control is then managed through a smartphone app or voice assistant.
Benefits and Uses
- Remote Control: Turn lights on or off from anywhere in the world.
- Scheduling: Set lights to turn on at sunset and off at bedtime.
- Voice Control: Integrate with Amazon Alexa, Google Assistant, or Apple HomeKit for hands-free operation.
- Energy Monitoring: Some smart plugs track energy usage, helping you identify power-hungry devices.
Setup Simplicity
Most smart plugs connect to your home Wi-Fi network via a user-friendly app. Follow the on-screen instructions, and you’ll be controlling your lights with your phone in minutes.
Smart Bulbs: Direct Upgrade
As mentioned earlier, smart bulbs screw into your existing fixtures.
Installation and Connectivity
Just like regular bulbs, screw them in. Then, use the manufacturer’s app to connect them to your Wi-Fi or a dedicated hub. Once connected, you can control brightness, color (if applicable), and set schedules.
Hub vs. Hubless
Some smart bulb systems require a central hub to communicate. Others connect directly to your Wi-Fi. Hubless systems are generally simpler to set up but might have limitations in terms of the number of devices or the complexity of automation.
DIY Picture Lights and Accent Lighting: Highlighting Your Treasures
Drawing attention to artwork, architectural features, or specific decor items can dramatically enhance a room’s appeal. These projects are often achievable with battery-powered or plug-in options.
Battery-Powered Picture Lights: Elegant and Easy
These are designed to mount directly above artwork.
Choosing the Right Size and Style
- Length: The light should be roughly two-thirds the width of the artwork.
- Brightness: Look for lights with adjustable brightness or a dimmable feature to avoid washing out the artwork.
- Color Temperature: Warm white LEDs are usually best for art, as they mimic natural light and won’t distort colors.
- Finish: Match the finish of the light (e.g., brass, black, brushed nickel) to the frame or the room’s hardware.
Installation and Battery Life
Most picture lights come with mounting brackets that screw into the wall above the artwork. Others use strong adhesive. Battery life varies greatly, so check reviews and look for models that use common battery sizes for easy replacement. Some even come with remote controls for added convenience.
Plug-in Accent Lights: Versatile Illumination
These can be used for more than just pictures.
Directional Spotlights
Small, plug-in spotlights can be discreetly placed on shelves or furniture to highlight specific objects. Many have flexible goosenecks or adjustable heads, allowing you to precisely direct the light.
LED Strips for Display Cabinets
If you have display cabinets, thin LED strips can be adhered to the inside edges to illuminate your collectibles. These are often plug-in and can be cut to size, making them a flexible solution.
Installation Tips
Ensure the power cord can be hidden neatly. Use cord clips or channels to run it along baseboards or behind furniture. For plug-in lights, always ensure they are not placed where they could be a tripping hazard or easily knocked over.
By focusing on these plug-in, battery-operated, and easily modifiable lighting solutions, you can significantly upgrade your home’s ambiance and functionality over a weekend, all without needing to call in the professionals. It’s about smart choices and a little bit of creativity to make your space shine.