How to Choose the Best Lawn Lights for Your Garden Ambiance
Choosing the “best” lawn lights really boils down to what you want to achieve with your garden’s feel, how much effort you’re willing to put in, and of course, your budget. There’s no one-size-fits-all answer, but by understanding the different types, power sources, and design considerations, you can definitely narrow down the options to create the perfect nighttime ambiance for your outdoor space. It’s about blending functionality with aesthetic appeal to highlight your garden’s features and make it more inviting after dark.
Understanding Light Types and Their Impact
When you’re thinking about lighting up your garden, the kind of light itself plays a huge role in the overall vibe. It’s not just about brightness; it’s about how that light interacts with your plants, pathways, and seating areas. Different light types create vastly different effects, from dramatic shadows to soft, inviting glows.
Spotlights vs. Floodlights: Directed Illumination
Spotlights and floodlights Bowcharms are often grouped together because they’re both about focused illumination, but they serve different purposes. Spotlights, as the name suggests, cast a narrow, intense beam of light. Think about highlighting a specific architectural feature, a striking plant specimen, or a piece of garden art. They’re great for creating drama and drawing attention to particular elements. You can use them to “uplight” a tree from its base, making its canopy stand out against the night sky, or to illuminate a textured wall. The key here is precision – you’re directing the viewer’s eye.
Floodlights, on the other hand, spread a much wider, less intense beam of light. They’re designed to illuminate a larger area generally, making them good for safety and general visibility. If you have a large open lawn, a patio, or a broad planting bed that needs general illumination, floodlights are a good choice. They reduce harsh shadows across a wide expanse, making it easier to navigate pathways or simply see what’s happening in your garden. While they don’t offer the same dramatic flair as spotlights, they provide a foundational layer of light that can be complemented by other, more focused fixtures.
Path Lights and Step Lights: Guiding the Way Safely
Path lights are probably one of the most common types of garden lighting, and for good reason. Their primary job is to illuminate pathways, driveways, and garden edges, making them safer to navigate after dark. They’re typically low to the ground and cast a downward or diffused light to prevent glare. The trick with path lights isn’t necessarily brightness, but consistent, even illumination along the entire path. You want to avoid creating dark spots that could be tripping hazards. Spacing is crucial here; too far apart, and you lose the continuous glow; too close, and it can look overdone.
Step lights are specifically designed for staircases and changes in elevation. They’re often recessed into the risers or sides of steps, providing a subtle glow that highlights the edge of each step. This is essential for safety, especially on multi-tiered patios or garden steps. Like path lights, the goal isn’t to blast light everywhere but to precisely illuminate the area of concern. They’re usually small, unobtrusive, and designed to blend into the hardscaping during the day.
Bollard Lights and Area Lights: Ambient Spreading
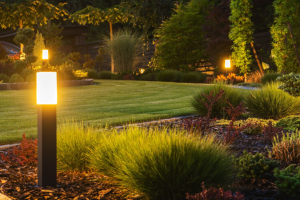
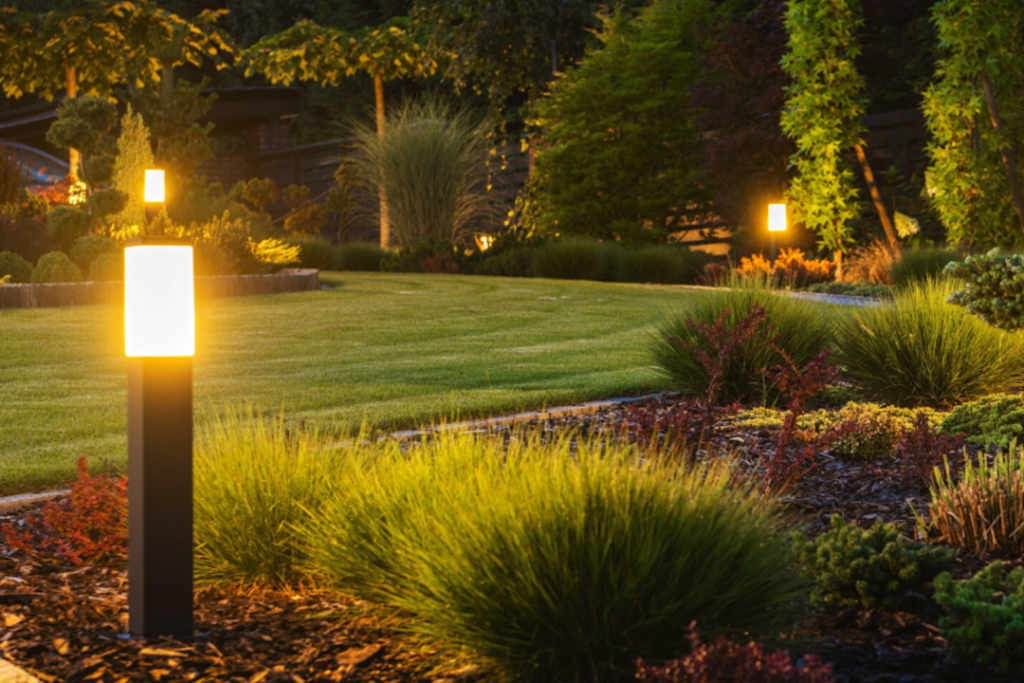
Bollard lights are essentially taller versions of path lights, often ranging from 1 to 4 feet in height. They typically have a cylindrical or square post design and cast light in a wider radius than a standard path light, though still generally downward or outward. They’re excellent for illuminating larger sections of a path, driveways, or even open lawn areas where you want a broader wash of light without the intensity of a floodlight. They offer a more robust aesthetic than many smaller path lights and can become a design feature in themselves.
Area lights are a broader category that often includes bollards but can also refer to fixtures designed to provide general ambient light over a wider space, like a patio or outdoor seating area. They might be mounted on a post, a wall, or even integrated into landscaping elements. The goal is to create a soft, inviting glow that makes a space feel comfortable and usable without being overly bright or creating harsh shadows. They help define outdoor “rooms” and extend your living space into the garden.
Uplights and Downlights: Enhancing Features
Uplighting involves placing a light fixture on the ground, shining upwards onto a feature. This technique is incredibly effective for highlighting the texture of tree trunks, the canopy of a shrub, a garden wall, or an architectural element. It creates dramatic shadows and emphasizes form, giving objects a sculptural quality after dark. For instance, uplighting a Japanese maple can make its delicate leaves glow, while uplighting a rough-textured stone wall can accentuate its rugged beauty.
Downlighting, conversely, places a light fixture above the feature, shining downwards. This often mimics natural moonlight filtering through trees or from eaves. It can be used to illuminate a pathway from above, create gentle pools of light on planting beds, or provide overall ambient light to a seating area. When mounted high in a tree, downlights can create beautiful dappled light and shadow patterns on the ground, adding depth and intrigue to your garden. The effect is generally softer and more natural than uplighting.
Decorative and Specialty Lights: Adding Flair
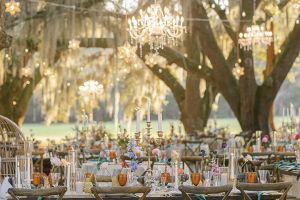
This category is where you can really let your personality shine. Decorative lights aren’t always about pure functionality; they’re about aesthetics and creating a mood. String lights (often called fairy lights or bistro lights) draped across a patio or pergola instantly create a festive, inviting atmosphere. They’re great for defining overhead spaces and adding warmth.
Lanterns, whether hanging or standing, offer a classic or contemporary touch and provide a soft, ambient glow. They can be placed on tables, hung from hooks, or interspersed within planting beds. Solar-powered novelty lights, like glowing orbs or animal shapes, add a whimsical touch. Submersible lights can illuminate ponds, fountains, or water features, adding a magical element and highlighting the movement of water. The key with decorative and specialty lights is to use them thoughtfully, as accents, rather than relying on them for primary illumination. They complement the more functional lighting, rounding out the overall garden ambiance.
Powering Your Garden’s Glow
How your lights get their juice is a fundamental choice that impacts installation, maintenance, and even the types of fixtures you can use. Each power source comes with its own set of advantages and considerations, from ease of installation to long-term costs and light output.
Low-Voltage Wired Systems: Reliability and Control
Low-voltage systems are powered by a transformer that reduces your household’s standard 120-volt current down to a safer 12-volt current. This is a very popular choice for permanent landscape lighting installations because it offers a great balance of reliability, performance, and safety.
The main advantage here is consistency. Low-voltage lights generally provide a brighter, more consistent light output than solar options, and they’re not dependent on daylight hours. You have a huge range of fixture styles and wattages to choose from, allowing for very specific lighting designs. They’re also often dimmable and compatible with smart home systems, giving you precise control over your garden’s ambiance.
Installation, however, is a bit more involved. It requires running a main cable (a heavy-gauge, direct burial cable) from the transformer, which is typically plugged into a GFCI-protected outdoor outlet, out into the garden. Individual light fixtures then tap into this main cable. While the wiring is low-voltage and generally safe to work with, careful planning is needed to ensure proper wire sizing for the total wattage of your fixtures, and to avoid voltage drop over long runs, which can dim lights furthest from the transformer. Though DIY-friendly with careful instruction, many people opt for professional installation to ensure optimal performance and longevity. The initial cost can be higher due to the transformer and cabling, but the results are generally superior and more durable.
Solar-Powered Lights: Convenience and Simplicity
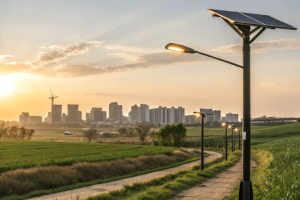
Solar lights have come a long way and are incredibly popular for their ease of use and eco-friendliness. They work by absorbing sunlight during the day via a small solar panel, charging an internal rechargeable battery. When dusk falls, a light sensor automatically switches them on, using the stored energy.
The biggest benefit is the incredibly simple installation. No wiring is required; you just stake them into the ground or hang them wherever you need light. This makes them ideal for renters, temporary installations, or for areas of the garden where running a wire would be impractical or expensive. They’re also free to operate after the initial purchase, as they don’t consume electricity from your grid.
However, solar lights have some limitations. Their performance is entirely dependent on sunlight. On cloudy days, in shaded areas, or during winter months with shorter daylight hours, their brightness and duration will be significantly reduced. The light output is generally not as powerful or consistent as wired systems, making them better suited for accent lighting, soft path illumination, or decorative purposes rather than primary security lighting. The batteries also have a finite lifespan and will eventually need to be replaced, typically every 1-3 years, depending on quality. When choosing solar, look for models with larger solar panels and higher mAh (milliampere-hour) battery capacities for better performance.
Battery-Operated Lights: Flexibility and Portability
Battery-operated lights, often using standard AA, AAA, C, or D batteries, offer ultimate portability and flexibility. Think about string lights for a party, temporary lanterns for a specific event, or small accent lights that you might want to move around frequently.
Their main advantage is that they can be placed absolutely anywhere, without any concern for wires or sunlight. This makes them perfect for specific events, for lighting areas that are very remote, or for adding a quick splash of light where it’s needed temporarily. Many come with timers, allowing you to set them to turn on and off automatically, conserving battery life.
The downside is the ongoing cost and hassle of replacing batteries. Depending on how frequently they’re used and their brightness, batteries can drain quickly. This makes them less practical for permanent, everyday garden illumination. They’re best reserved for supplemental lighting, decorative touches, or situations where a truly temporary and mobile light source is required. Rechargeable batteries can mitigate some of the environmental impact and ongoing cost, but still require regular removal and recharging.
AC (Mains) Powered Lights: High Power, Specific Applications
AC powered lights connect directly to your home’s main electrical supply, typically 120 volts in North America. These are less common for general garden ambiance lighting but are essential for specific, high-power applications.
These lights offer the brightest output and are crucial for things like security floodlights, powerful patio heaters with integrated lights, or specific high-output fixtures that need substantial wattage. They are also used for permanent, high-power outdoor outlets for tools or entertainment systems.
Installation is the most complex and potentially dangerous of all the options. It absolutely requires a qualified electrician to ensure proper wiring, grounding, and compliance with local electrical codes. All fixtures and wiring must be rated for outdoor use and properly sealed against moisture. While powerful and reliable, the rigidity of placement and the significant installation cost make them impractical for most general garden ambiance lighting needs, where lower voltage options are usually sufficient and safer to work with.
Crafting Your Garden’s Mood: Design Principles
Once you understand the types of lights and how they’re powered, the real fun begins: designing. This is where you think like an artist, using light to paint your garden at night, highlighting its best features and creating different emotional responses in various zones.
Layering Light for Depth and Interest
Think of light in your garden like layers of an onion or a well-composed painting. You don’t want a single, flat wash of light. Instead, you want to build up the illumination, creating depth and visual interest.
Start with your “task” or “safety” layer. This includes path lights, step lights, and general area lights that ensure safe navigation and basic visibility. This is your foundation.
Next, add your “accent” layer. This is where spotlights come in, highlighting key features like a beautiful tree, a statue, or a textured wall. These draw the eye and create focal points.
Finally, incorporate your “ambient” or “decorative” layer. This includes softer lights like string lights, lanterns, or bollards that provide a gentle glow and enhance the overall atmosphere, making the space feel inviting and comfortable.
By layering these different types of light, you avoid a sterile, overly bright look and instead create a dynamic, engaging nighttime landscape that reveals new details and perspectives after dark. It’s about creating contrast between light and shadow, which is often as important as the light itself.
Considering Color Temperature: Warm vs. Cool
The color of the light itself, known as color temperature, has a profound impact on the mood of your garden. It’s measured in Kelvins (K).
- Warm White (2700K – 3000K): This is the most popular choice for garden ambiance. It mimics the warm, inviting glow of candlelight or traditional incandescent bulbs. It creates a cozy, relaxed, and welcoming atmosphere, perfect for patios, seating areas, and highlighting natural textures in plants and stone. It feels natural and comforting.
- Neutral White (3500K – 4000K): This offers a cleaner, brighter look without being overly cool. It’s good for areas where you need a bit more clarity, perhaps around a grilling station or a workspace, but still want a somewhat inviting feel. It’s a good middle ground if warm white feels too yellow or cool white too stark.
- Cool White / Daylight (5000K – 6500K): This light has a bluish tint, mimicking natural daylight. While it’s great for task lighting in workshops or security areas where maximum visibility is paramount, it can feel harsh and artificial in a garden setting meant for relaxation. It tends to flatten colors and can make a garden feel less inviting. Generally, for ambiance, avoid anything above 4000K unless you have a very specific, modern aesthetic in mind.
- RGB (Red, Green, Blue) / Color-Changing: Some LED lights offer full-color changing capabilities. While fun for parties or special occasions, using them subtly is key for everyday ambiance. A soft blue can mimic moonlight, or a subtle green can enhance foliage, but flashing or intensely saturated colors can quickly become kitschy rather than atmospheric.
Avoiding Glare: Comfort and Safety
Glare is the enemy of good lighting design. It occurs when a light source is too bright, poorly aimed, or unshielded, shining directly into your eyes. Not only is it uncomfortable and annoying, but it also diminishes your ability to see other illuminated features because your eyes are struggling to adjust.
To avoid glare:
- Shielded Fixtures: Choose fixtures with shrouds, frosted lenses, or downward-facing designs that direct light onto the target area and away from observers’ eyes. Path lights should cast light downwards, not outwards into the eyes.
- Proper Aiming: When using spotlights, aim them precisely at the feature you want to highlight, ensuring the beam terminates on the object and doesn’t spill into view.
- Strategic Placement: Place lights where they won’t be directly in the line of sight from common viewing angles (e.g., from a patio chair, window, or along a main pathway). Bury uplights flush with the ground if possible, or position them behind plants.
- Dimming: Utilize dimmers on your low-voltage or AC systems to adjust brightness as needed. Sometimes, a lower light level creates a more pleasant effect and reduces glare naturally.
- Keep it Low: For general area lighting, opt for lower light levels spread over more fixtures rather than one very bright light. This creates a softer, more even glow.
Highlighting Key Features: Focal Points
Every garden has its stars – a magnificent tree, a bubbling fountain, a beautifully textured wall, a captivating sculpture, or even a perfectly manicured rose bush. Effective lighting uses these features as focal points, drawing the eye and emphasizing their beauty after dark.
- Uplight Trees and Shrubs: Position a spotlight at the base of a tree, shining up into its canopy. This highlights the trunk’s texture, the branch structure, and the leaves, creating a dramatic, sculptural effect. Varying the angle can change the shadows and impact.
- Accentuate Water Features: Use submersible lights in ponds or fountains to make the water glow and highlight its movement. Position lights to catch the spray of a fountain or the ripple of a pond’s surface.
- Illuminate Architectural Elements: Use wall washers to graze a textured stone wall, bringing out its character, or spotlights to highlight unique architectural details of your home or garden structures.
- Emphasize Sculptures or Art: A strategically placed spotlight can make a garden sculpture come alive at night, creating dramatic shadows and revealing its form in a new way.
- Frame Pathways and Beds: While path lights guide the way, consider using a few small uplights within a planting bed to highlight a particularly beautiful plant or section, adding depth to the foreground.
The goal is to enhance what’s already beautiful, not to simply make everything visible. Think about what you want people to notice and use light to direct their attention there.
Material Matters: Durability and Aesthetics
The materials your lawn lights are made from not only impact their visual appeal during the day but also their ability to withstand the elements and provide reliable illumination for years to come. Investing in quality materials generally pays off in the long run.
Copper and Brass: Timeless and Resilient
Copper and brass are often considered the gold standard for outdoor lighting fixtures, and for good reason. They are highly durable, naturally corrosion-resistant, and age beautifully.
- Durability: Both metals are robust and can withstand harsh weather conditions, including extreme temperatures, rain, and snow, without rusting or degrading. They are less likely to crack or become brittle over time compared to plastics.
- Aesthetics: Initially, copper and brass have a bright, attractive sheen. Over time, they develop a natural patina – a greenish-brown coating for copper (like the Statue of Liberty) and a darker, richer brown for brass. This patina is not a sign of corrosion but a protective layer that enhances their classic, elegant appearance, allowing them to blend seamlessly into a natural garden setting. Many homeowners specifically choose these materials for their evolving beauty.
- Cost: Fixtures made from solid copper or brass are typically the most expensive upfront. However, their longevity and timeless aesthetic often make them a worthwhile investment for a permanent landscape lighting system.
Stainless Steel: Modern and Strong
Stainless steel offers a sleek, modern look and excellent strength. It’s another highly durable option for outdoor lighting.
- Durability: Stainless steel is highly resistant to rust and corrosion, thanks to its chromium content, making it suitable for most outdoor environments. It’s also very strong and can withstand physical impacts better than some other materials.
- Aesthetics: It typically has a contemporary, polished, or brushed silver finish that suits modern garden designs and complements homes with a minimalist aesthetic. It maintains its look without developing a significant patina.
- Cost: Stainless steel fixtures are generally more expensive than aluminum or plastic but often less costly than solid copper or brass.
- Considerations: While generally rust-resistant, some lower grades of stainless steel might show surface rust (tea staining) in very salty or humid coastal environments. Look for higher grades like 316 marine-grade stainless steel if you’re in such an area.
Aluminum: Versatile and Affordable
Aluminum is a very common material for outdoor lighting due to its balance of affordability, durability, and versatility.
- Durability: Aluminum is lightweight and naturally resistant to rust. Most outdoor aluminum fixtures are powder-coated or anodized, which adds an extra layer of protection against corrosion, chipping, and fading. This coating is crucial for its longevity.
- Aesthetics: It can be finished in a wide range of colors (black, bronze, white, green, etc.), making it adaptable to almost any garden style. It offers a clean, consistent look that won’t change over time like copper or brass.
- Cost: Aluminum fixtures are generally more affordable than copper, brass, or stainless steel, making them a popular choice for larger installations or projects with budget considerations.
- Considerations: The quality of the powder coating is key. A cheap or thin coating can chip, exposing the aluminum beneath, which can then oxidize and degrade the appearance. Good quality aluminum fixtures, however, can last for many years.
Plastic and Resin: Budget-Friendly and Lightweight
Plastic and resin fixtures are typically found in the most budget-friendly solar and battery-operated lights.
- Durability: While modern plastics and resins (like ABS or polypropylene) are designed for outdoor use and can be UV-stabilized to resist fading and becoming brittle in the sun, they are generally less robust than metal options. They can crack from impacts, extreme cold, or prolonged sun exposure.
- Aesthetics: They often come in various colors and designs, mimicking the look of metal or stone, but typically lack the substantial feel and long-term elegance of metal fixtures.
- Cost: This is their biggest advantage – they are very inexpensive, making them accessible for anyone wanting to add some light without a significant investment.
- Considerations: Expect a shorter lifespan compared to metal fixtures. They are best suited for temporary installations, areas where aesthetics are less critical, or when budget is the primary driver. They are also lightweight, which can be a disadvantage in windy areas if not staked securely.
Glass vs. Plastic Lenses: Clarity and Longevity
The material of the light’s lens also matters:
- Glass Lenses: Provide superior clarity and light transmission, don’t yellow or fog over time, and are generally more scratch-resistant. They add a premium feel to a fixture. However, they are more fragile and can break if impacted.
- Plastic Lenses (e.g., Polycarbonate, Acrylic): More durable and shatter-resistant than glass, making them safer in high-traffic areas or where kids/pets play. However, lower-quality plastics can scratch, yellow, or become cloudy with prolonged UV exposure, reducing light output and aesthetic appeal over time. Good quality, UV-stabilized plastics are a better choice if choosing plastic.
Installation and Maintenance Tips
Getting your lights in the ground and keeping them working well is crucial for enjoying your garden ambiance. A little planning and ongoing attention go a long way.
Planning Your Layout: The Blueprint
Before you buy a single light, grab a pencil and paper (or a digital tool) and sketch out your garden. This step is often overlooked but is the foundation of a successful lighting design.
- Map Existing Features: Mark down your house, patio, pathways, prominent trees, shrubs, water features, seating areas, and any garden art.
- Identify Focal Points: Decide which elements you want to highlight. Is it a magnificent oak? A charming fountain? A specimen rose?
- Consider Viewing Angles: Where will you typically be viewing your garden from? Your living room window, the patio, or a dining area? Plan light placement to avoid glare from these vantage points.
- Trace Pathways and Steps: Clearly mark all routes that need illumination for safety.
- Mark Power Sources: Note the location of outdoor outlets if you’re using low-voltage or AC lights. For solar lights, identify areas that receive at least 6-8 hours of direct sunlight.
- Experiment with a Flashlight: Go out at night with a strong flashlight and “paint” light onto your garden features. See how shadows fall, what looks best uplight or downlight, and where general illumination is needed. This gives you a real-world preview.
- Zoning: Think about creating different “zones” with varying light levels and moods. A bright patio for entertaining, a softly lit pathway, and dramatic uplighting on a distant tree.
Having a plan helps you decide how many fixtures you need, what types, and where they should go, preventing impulse purchases and costly mistakes.
Wiring Best Practices for Low-Voltage Systems
For low-voltage systems, proper wiring is essential for safety, performance, and longevity.
- Use Direct Burial Cable: Always use cable specifically rated for direct burial. This cable has a tough outer sheath to protect it from moisture, insects, and minor damage.
- Bury Cables Safely: While low-voltage cable is safer than line voltage, it’s still good practice to bury it, typically 6-12 inches deep, to protect it from garden tools, pets, and accidental damage. Avoid burying it under existing large roots if possible.
- Proper Wire Sizing: This is critical. If your total wattage of lights is too high for the gauge of your cable, or the run is too long, you’ll experience voltage drop, meaning lights furthest from the transformer will be noticeably dimmer. Consult a voltage drop chart based on your total wattage and cable length. Often, 12-gauge cable is recommended for longer runs or higher wattage loads, while 14- or 16-gauge might be fine for shorter runs with fewer lights.
- Secure Connections: Use waterproof connectors for all wire splices and connections to fixtures. Silicone-filled wire nuts or crimp connectors with heat-shrink tubing are good options to prevent moisture ingress, which can cause shorts and corrosion.
- Loop vs. Trunk-and-Branch: For larger systems, a “loop” wiring method (where the cable forms a complete loop back to the transformer) can help minimize voltage drop, as power flows from two directions. A “trunk-and-branch” system (single cable running out with fixtures tapping off) is simpler for smaller layouts.
- Transformer Placement: Place the transformer in an easily accessible location, plugged into a GFCI-protected outdoor outlet, and ideally mounted off the ground to protect it from standing water.
Optimal Placement for Solar Lights
Solar lights are easy to install, but their performance heavily depends on proper placement.
- Maximum Sunlight Exposure: This is paramount. The solar panel needs direct, unobstructed sunlight for at least 6-8 hours a day to fully charge the battery. Avoid placing them under trees, eaves, or in the shadow of buildings, even if the area appears bright during the day.
- Avoid Competing Light Sources: If placed too close to other bright lights (like security lights or porch lights), the light sensor on the solar fixture might detect enough ambient light to keep it from turning on, or cause it to turn off prematurely.
- Strategic Purpose: Use solar lights where their lower, softer output is appropriate – accenting planting beds, lining short pathways, or highlighting small features. Don’t rely on them for high-intensity security lighting.
- Clear Debris Regularly: Leaves, dirt, bird droppings, or snow on the solar panel will significantly reduce its charging efficiency. Wipe them clean regularly.
Regular Maintenance for Longevity
No matter the power source, a little routine maintenance will keep your lights shining brightly and prevent premature failure.
- Clean Fixtures and Lenses: Over time, dirt, dust, pollen, and hard water spots can accumulate on light lenses and fixture bodies, reducing light output and dimming the appearance. Wipe them clean periodically with a soft cloth and mild soap. For solar lights, keep the solar panel itself clear.
- Check Bulbs/LEDs: Even long-lasting LEDs can eventually fail. Replace any burnt-out bulbs promptly. For integrated LED fixtures, if a light goes out, the entire fixture usually needs replacement unless it’s a modular design.
- Inspect Wiring and Connections (Low-Voltage): Periodically check exposed wiring for damage (from critters, garden tools, or weather). Ensure all wire connections are secure and waterproof. If you notice lights dimming, it could indicate a loose connection or voltage drop issues.
- Trim Foliage: As plants grow, they can obscure light fixtures, blocking light output or even causing glare if light is diffused improperly. Trim back any encroaching foliage to ensure clear light paths and highlight your features effectively.
- Adjust Aiming: Over time, fixtures might get bumped or shifted. Re-aim spotlights and uplights to ensure they are still illuminating your intended features effectively and not causing glare.
- Battery Replacement (Solar/Battery-Operated): For solar lights, the rechargeable batteries will degrade over 1-3 years. If your solar lights are dim or not staying on as long as they used to, it’s likely time to replace the internal battery (check the manufacturer’s recommendations for type and size). For other battery-operated lights, simply replace standard batteries as needed.
By following these tips, you’ll ensure your garden lights remain a beautiful and functional addition to your outdoor living space for many years.